|
Adding CapacityYou've seen it done any many ways at VWB, but check this out... Picture: WSM
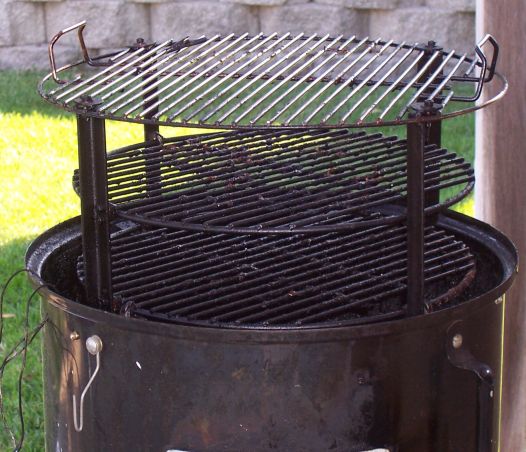
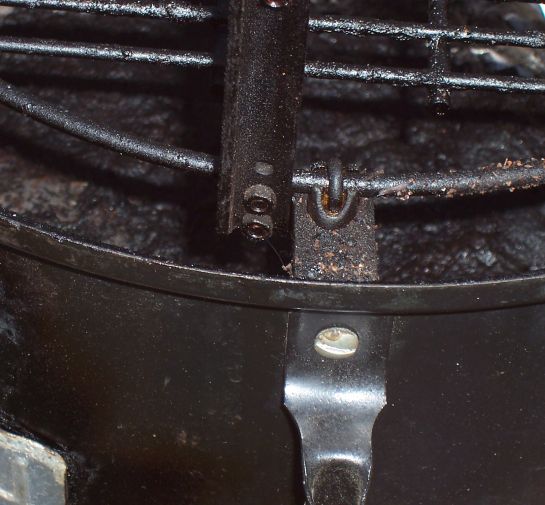
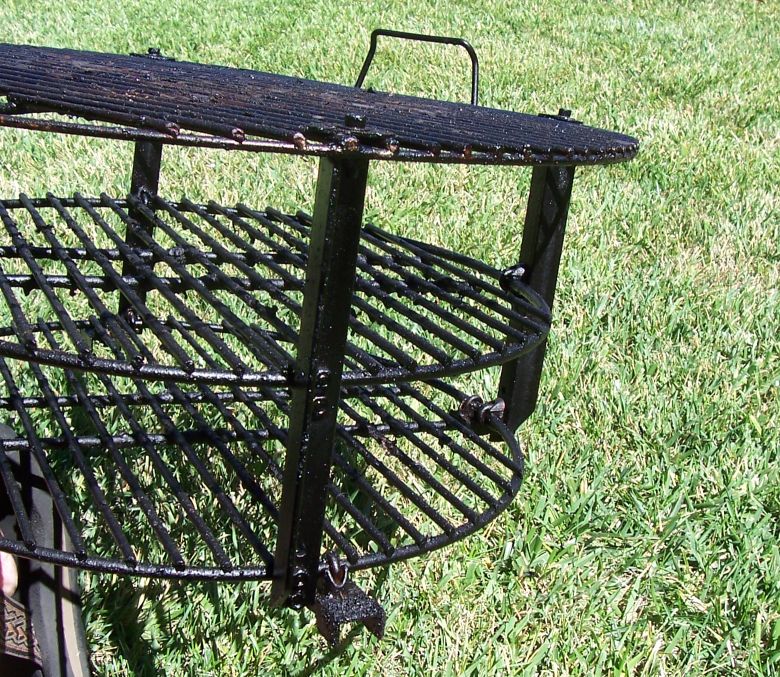
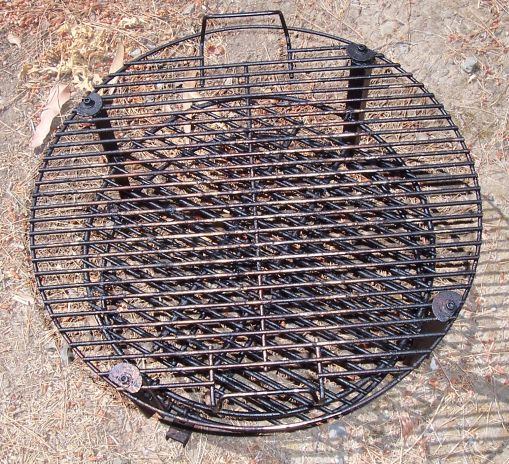
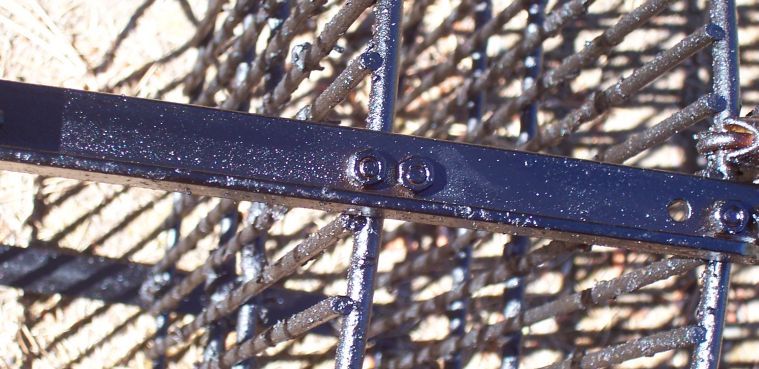
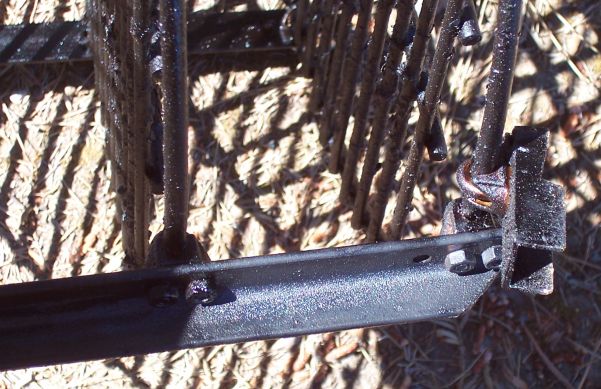
Capacity mod in action 1 Problem 1 - The obvious, the capacity is not always sufficient for competition or entertaining get-togethers. Problem 2 - Yes there's a second grate but have you actually tried using it? Problem 3 - Ok, you've expanded capacity, but now what? Here's the thing. Although there is a second cooking grate, it rests below the top grate - obviously. Now what happens when you need to access the meat on the second grate? You left off the top - and set it where? Or you have a temp probe in the top grate, now what? This WSM modification build upon familiar ideas linked to above - connected grates forming a cage - with some new ideas for refinement. What if you actually had someplace to put the cage when you lift it out for access to the lower grates? Someplace where dripping grease wouldn't matter - neither would the mop, spray or rub make a mess. It's simple - not only are the grates connected, but they make use of the tabs that the top grate uses for resting the cage on - how's that??? No worries about pulling out the temperature probe, dropping meat, or making a mess. Sounds good? Here's how I did it: First off, I replaced the bottom cooking grate with two coal grates. The lower food grates is actually just a little too large to lift straight out of the cooker - it needs to be tilted a little to get it out. This wouldn't do for these mod because the cage needs to left straight out. Second, I used 3/4x3/4 L stock, mild steel as the vertical bars. These I cut and shaped to the right size. Along with 1/8 inc cable clamps to fasten the grate gives just the right size. The L stock help guide the cage into place without grates hooking up on the tabs, nuts and bolts inside the body in this area. Third, this is where I'd make a change. In the picture, you see the bar cut at an angle - this was done to facilitate easy entry of the cage into the body. Turns out, it's not needed, serves no purpose, and actually complicates things. Here's why - As you can see here, I've attached some channel to the grate so that it can rest on the original tabs that the top grate sits on - this is the magic of this mod. If the bar were not cut at an angle, I could have a much more elegant solution by welding a piece of that channel onto the end of the bar - wallah. Instead, I have this clumsy design. FYI - Here are the grate sizes and model numbers for your information. The sizes listed are the correct sizes - Weber insists that the 17.5 inch grate is 18 inches. 1 - Top: Part # 970601, 17-1/2" diameter - $12.99
|
|
Next appearance:
|
|||


© Too Ashamed to Name, 2008-2013. All Rights Reserved. A San Jose BBQ team